이번 게시글에서는 Flutter에서 Firebase 및 환경변수를 debug, release 모드 별로 빌드할 수 있는 방법에 대해서 서술해보겠습니다.
Fastlane과 같은 베포 파이프라인을 활용하는 방식이 아닌, Shell 코드를 통해서 직접 파일을 변경해주는 방식으로 진행해보겠습니다. 위와 같은 방법을 사용하는 이유는 iOS 설정에서 build flavor에 따른 각각 다른 Firebase 세팅을 해주는 것이 상당히 난이도가 높기 때문입니다.
0. 사전 세팅
본론으로 돌아와서, 먼저 FlutterFire를 설치해보도록 하겠습니다. FlutterFire는 Flutter Plugin들로 이루어진 라이브러리로써, Flutter Application과 Firebase 프로젝트를 손쉽게 연동시켜줄 수 있습니다.
더 자세한 설명 및 OS 별 설치 방법은 다음 주소에서 확인해주시기 바랍니다.
https://firebase.flutter.dev/docs/overview
FlutterFire Overview | FlutterFire
<img
firebase.flutter.dev
저는 윈도우에서 Android Studio의 Command Prompt(Terminal)을 활용해서 진행해보겠습니다. (npm, node가 설치되어 있다는 가정 하에 진행합니다. npm 및 node 설치는 https://nodejs.org/en/download/ 이 사이트에서 최신 버전의 msi를 다운로드 받은 이후에, 설치하고 cmd에서 npm --version 명령어를 통해서 설치가 완료되었음을 확인할 수 있습니다.)
1. npm을 활용해서 Firebase-tools를 설치합니다.
npm install -g firebase-tools
2. dart 패키지 중에서 flutterfire를 설치합니다.
dart pub global activate flutterfire_cli이렇게 진행하면 다음과 같은 경고메시지를 확인할 수 있습니다.

환경변수에서 pub 경로가 제대로 지정되지 않았다는 뜻이니, 윈도우의 환경변수에서 해당 값을 추가시켜줍니다.

해당 환경 변수를 추가하고 나서, Android Studio를 재실행시키고 다시 터미널을 열여서 flutterfire 명령어를 입력해보면 제대로 설정되었음을 확인할 수 있습니다. (참고로, Android Studio에서 터미널을 열면 기본값이 local로 열리는데, local이 아니라 Command Prompt로 열어야 제대로 동작합니다)

1. 세팅 시작
Firebase 소유자 혹은 관리자로 설정되어 있는, Google 계정으로 로그인된 크롬 브라우저를 띄워놓은 상태에서 firebase login을 진행합니다.
firebase login
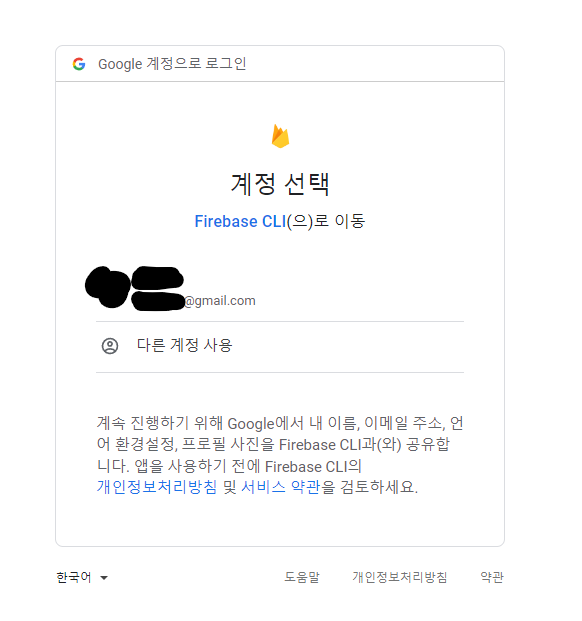
위의 화면에서 Firebase 프로젝트 소유자 계정을 선택한 뒤, 허용을 해줍니다. 허용되었다는 메시지를 확인한 뒤, 터미널로 돌아오면 성공적으로 로그인 되었다는 메시지를 확인할 수 있습니다.

이제 flutterfire configure 명령어를 통해서 Flutter 어플리케이션과 Firebase 프로젝트를 연동시켜봅시다.
flutterfire configure # --project=<projectId> --yes 이 옵션을 붙이면 프로젝트 선택창을 넘길 수 있습니다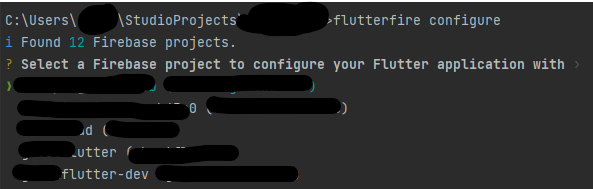
여기서 본인이 debug 모드에서 사용하고 싶은 firebase 프로젝트를 선택해줍니다.

현재 사용중인 OS를 선택한 이후에, Enter를 눌러 넘어가줍시다. (OS 선택은 Spacebar로 가능합니다)
잠시 기다려주면, 다음과 같이 설정이 완료됩니다.

설정해두면 다음과 같은 파일들이 생성되었을 것입니다.
firebase_app_id_file.json 	# {root}/ios
firebase_options.dart		# {root}/lib
google-services.json		# {root}/android/app
GoogleService-Info.plist	# {root}/ios/Runner
하지만, firebase_options.dart 파일에 인덱싱이 제대로 되어있지 않을텐데, 아직 firebase_core 라이브러리가 설치되지 않아서 생기는 이슈입니다. pub.dev 여기에서 최신 버전의 firebase_core를 찾아서 pubspec.yml에 적용시켜주면 파일 인덱싱이 정상으로 되는 것을 보실 수 있을겁니다.
이후에, 위의 파일들을 모두 {root}/deploy/firebase/debug 디렉터리에 복사해줍니다.

이후에 다시 터미널에서 아래 명령어를 통해서 release 모드에서 사용할 Firebase 프로젝트를 세팅해줍니다.
flutterfire configure --project=<release 모드로 사용할 프로젝트 아이디> --yes아까와 동일한 위치에 동일한 Firebase 세팅 파일들이 생성되었을텐데, 이를 {root}/deploy/firebase/release 디렉터리에 복사해줍니다.

lib/main.dart 파일에서 runApp 함수 앞에 아래 두 줄을 추가해줍니다.
void main() async {
  WidgetsFlutterBinding.ensureInitialized();	// 이거 추가
  await Firebase.initializeApp(options: DefaultFirebaseOptions.currentPlatform);	// 이것도

  runApp(const ProviderScope(child: Application()));
}
2. Shell 코드 작성
{root}/deploy/shell 디렉터리에 다음 파일들을 생성해줍니다.
deploy_dev.sh
deploy_prod.sh
dev 쪽에는 debug 관련 동작들을, prod 쪽에는 release 관련 동작들을 정의할 예정입니다.
deploy_dev.sh 파일의 내용은 다음과 같습니다.
#!/bin/bash
echo "########### Start Firebase Debug Setting"

cd ..
echo "########### Remove Build Folder"
rm -rf build

echo "########### Remove Google Service file and replace it with the new one"
rm android/app/google-services.json
cp deploy/firebase/debug/google-services.json android/app/google-services.json

rm lib/firebase_options.dart
cp deploy/firebase/debug/firebase_options.dart lib/firebase_options.dart

echo "########### Remove iOS Config file and replace it with the new one"
rm ios/GoogleService-Info.plist
cp deploy/firebase/debug/GoogleService-Info.plist ios/GoogleService-Info.plist

rm ios/firebase_app_id_file.json
cp deploy/firebase/debug/firebase_app_id_file.json ios/firebase_app_id_file.json

echo "########### Init Flutter Setting"
flutter clean
flutter pub get
deploy_prod.sh 파일의 내용은 다음과 같습니다.
#!/bin/bash
echo "########### Start Firebase Release Setting"

cd ..
echo "########### Remove Build Folder"
rm -rf build

echo "########### Remove Google Service file and replace it with the new one"
rm android/app/google-services.json
cp deploy/firebase/release/google-services.json android/app/google-services.json

rm lib/firebase_options.dart
cp deploy/firebase/release/firebase_options.dart lib/firebase_options.dart

echo "########### Remove iOS Config file and replace it with the new one"
rm ios/GoogleService-Info.plist
cp deploy/firebase/release/GoogleService-Info.plist ios/GoogleService-Info.plist

rm ios/firebase_app_id_file.json
cp deploy/firebase/release/firebase_app_id_file.json ios/firebase_app_id_file.json

echo "########### Init Flutter Setting"
flutter clean
flutter pub get
이런 방식으로 각각 debug, release 모드의 firebase 프로젝트들을 Flutter 어플리케이션에 적용 가능합니다.
각각의 모드 적용은 아래 커맨드로 가능합니다.
cd {root}/deploy/shell

# debug 모드의 경우
sh deploy_dev.sh

# release 모드의 경우
sh deploy_prod.sh
위 커맨드를 실행시킨 이후에 build 혹은 run을 진행하면 각기 모드에 맞는 firebase 프로젝트가 적용되었음을 확인할 수 있습니다.
다음 글에서는 api base url 같은 상수값과 android에서 debug 및 release 키를 적용시키는 방법에 대해서 포스팅하겠습니다.
'Flutter' 카테고리의 다른 글
| In Flutter, which Empty Widget is most fastest? (0) | 2023.01.29 |
|---|---|
| Flutter with ChannelTalk (0) | 2023.01.06 |
| CheckBox Inner Color Not Changed (0) | 2022.12.28 |
| Flutter Clean Architecture (0) | 2022.12.28 |